4/29/15

Thank you Candy Jars

Hi everyone.  You do know that there are no mistakes in crafting only opportunities for exploring new avenues, right?  How many times have you created something only to have it not turn out quite right?  What do you do?  How do you correct a mistake? 

This  candy jar was created from a mistake I made.  The product performed as it should. I just didn't read the directions properly!!  How often do we do that!


I have been working with  etchall dip 'n etch - love this stuff!  Dip 'n etch is a reusable liquid that creates a frosted appearance on glass surfaces.  I wanted to create some thank you gifts for a party so I placed outline stickers around a glass jar and, per the directions, placed the jar in the dip 'n etch for 15 minutes. 


After waiting the allotted time, I poured the dip 'n etch back into the bottle.  Then I removed the stickers and rinsed off the jar.  As it dried, this is the result.  Had I read the bottle of dip 'n etch more carefully, I would have known dip 'n etch crystallizes when it's cold.  And, it has been very cold here in New York.  Even though it is finally warming up, my studio is still pretty cold.  Had I warmed the bottle of dip 'n etch first, I would not have had this issue.

 
I knew I could not continue with the jar as I originally planned, so I pulled out some products from Earth Safe Finishes.  They carry some wonderful products and I thought I'd see if they could help me salvage my project.  I decided to use Berry Iridescents by Ann Butler and painted over the etched jar.  The dip 'n etch created a nice texture that allowed the Iridescents to adhere.  Look at what I was able to do!  You'd never know that I fixed a mistake now, would you! 


Next, I tied some sparkly Offray ribbon around the jar.


Then, I added a friendship stamp on the cap, placed some candy inside and a wonderful gift has been created.   I am definitely using this as my party thank you now.


So, what do you do when a project does not go as planned?  I'd love to know.
 
Steph

4/26/15

Apple Picking with So Suzy stamps

Hi everyone, I've got another card this month on the So Suzy blog.  Remember to stop by the So Suzy Stamps Store and check out all the new stamps available this month.  You are going to love them.

This little gal is adorable reaching for the apples.  She was colored with Copic Markers.


The background was embossed and a die cut barrel of apples border was placed along the bottom edge of the card. 


Isn't she just so sweet?
 
Thanks for stopping by today.
 
 
Steph
 

4/25/15

Home Canvas with Arc Barc Wood and Clearsnap Ink

Good morning everyone.  Have you seen  Arc Barc Wood products yet?  They create wood paper sheets that can be used for all your crafting needs.

Let me show you how I created this home canvas.


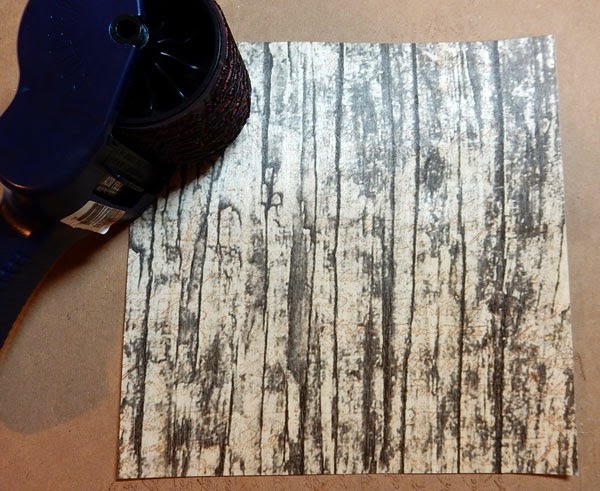
I used the Rustic Birch BARC Wood Sheet for the base of my project.  I wanted to add some additional dimension so I  used the Wordwords Rollagraph Wheel across the panel.  It's heard to see, but it really added some nice dimension.  Since the wood panel is self adhesive it easily adhered to the canvas.
 
 
The fence was cut from White Birch Barc Wood Sheet and then embossed with an embossing folder and inked.  The trellis was die cut from White Birch Barc Wood Sheet and it cut beautifully.


The house was stamped 3 times and various elements were placed on top for more dimension.  Smooch Accent Ink added some subtle colors to the windows and door of the house.  Assorted flowers were also stamped, colored with Smooch Accent Ink and fussy cut.  They were added about the trellis.


The trees were stamped and inked and also fussy cut.  I found a small heart punch that created hearts that fit the trees.   Just for fun, I added some small rocks to the bottom of the fence.


I loved working with the Wood paper - it really adds a wonderful element to my project.

Thanks for stopping by today.

Steph

4/23/15

TKE Fraternity Etched Soda Bottles

Hi everyone, I've got a project to share today using etchall etching crème.  Etchall is so much fun to use with relatively little work to be done by you!

My son recently asked me to create some centerpieces for his Fraternity's meeting.  He gave me no ideas of what they wanted, just something "pretty".  Well, that could mean almost anything to a bunch of guys!  But I recent picked up some soda bottles and thought I could use them for this project.


I began by using my Cricut and die cutting vinyl with his fraternity letters, TKE.  I used the negative vinyl die cut and after placing it on the soda bottle, I added etchall etching crème on the vinyl, leaving it in place for approximately 15 minutes.   Using the negative is a great way to avoid having to add tape around the area you don't want etched.


The etching crème is reusable, so after the allotted time, I removed the etching crème and placed it back into the jar.  After rinsing the jar, I removed the vinyl.


This is the result - beautiful lettering that looks so professional.  I placed little rocks in the bottom of the bottles for support.


I made some large tissue paper flowers for each bottle and tied some burlap ribbon around the neck of each.


My son actually said he and the guys liked them!  What a compliment!
 
Thanks for stopping by today.
 
Steph


4/21/15

Blue Resin Paperweight

Hi everyone, I'm featured on the ETI-USA blog today with this fun resin paperweight.

After pouring some resin in the mold, I added assorted beads and flowers.


Because elements you add to the resin during the curing process will naturally sink to the bottom of the mold, allow some curing time before adding additional elements.  You want the elements to appear to be floating in the resin.


Just think of the variety of paperweights you can create with these awesome products.  Please stop by the ETI-USA blog for the details.
 
Thanks for stopping by today.
 
 Steph


Child's Birthday Card

It's a new challenge at Cornish Heritage Farms, and Kelly challenged us to create a card for a child.

I found this All Ears Dog digital image in the store and knew it would be perfect for a child's card.  I colored the image with Copic Markers and die cut the oval so the image would stand out.  His ears were popped on the card for added dimension.


The sentiment is from the new Birthday Greetings stampset  which has 10 unique sentiments.  Love it.


Thanks for stopping by today and be sure to stop by everyone's blog to see what they've created.


Steph


4/16/15

Resin Molded Pieces with Transparent Dyes

Hi everyone, I've been working with Envirotex Jewelry Resin and the jewelry molds from ETI.   I've created a number of resin pieces using an assortment of products.

You will need:
Mold Release/Conditioner
Envirotex Jewelry Resin
Green Transparent Dye
Yellow Transparent Dye
Amber Transparent Dye
Blue Transparent Dye .


After waiting for the molds to set, I popped out all these fun pieces.


Now, I just need to decide how to use them.
 
Please check out my blog post here for all the details.
 
Thanks for stopping by today. 
 
 
Steph


4/15/15

Stamped and Dyed Scarf

Good morning everyone.   Welcome to the blog hop and book tour for Tiffany Windsor's Creative Scarves book.


I am thrilled to be involved with a blog hop this week for Tiffany Windsor's Creative Scarves book.  I love making scarves so when I was asked if I would be willing to review Tiffany Windsor's newest book, I immediately said yes.   I generally crochet scarves, but was intrigued to see other ways to create scarves.

This 128 page book is packed with wonderful images and detailed directions for completing each scarf.  The photos are amazing and the instructions are detailed, yet easy to follow.

The book is broken into 5 sections - Spring, Summer, Autumn, Winter, and Couture - so you can easily search for a scarf based on any requirements you might have.  And I was amazed at the variety of projects that used felting, embroidery, stamping, doodling, beading, crochet, painting and so much more.   Each time I perused this book, I found something new I wanted to try.

I am an avid stamper - I adore my stamps and inks.  When I saw the variety of projects using stamps, I knew I wanted to give it a try.  I will say that larger, open stamps are better for this project.  I found that detailed stamps did not work as well for me (but that's not to say I won't try them again!).


Supplies:
Silk-type fabric
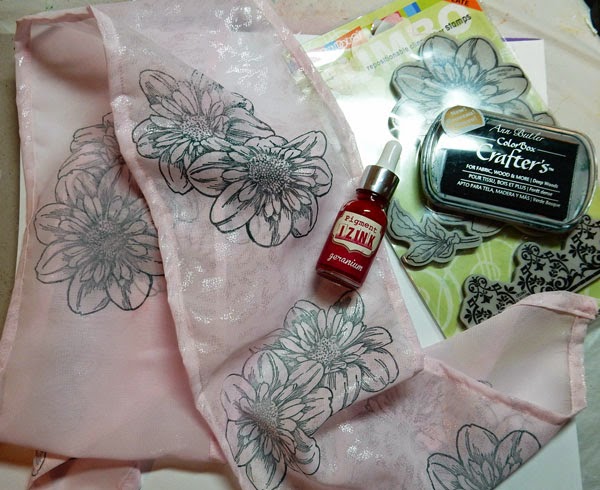
ColorBox Crafter's Ink by Ann Butler - Deep Woods
Izink Ink - Geranium
Stampendous Stamp


I found some pretty silk-type fabric with a slight pattern.
Since it was stark white, I soaked it in a mixture of Izink and water overnight.
I simply filled a contained with water and added 6-7 drops of Geranium Izink Ink

 
Once dry, this lovely pink tone was the result.
I hung it up to dry overnight.
Using Deep Woods Crafter's Ink, I stamped the images about the scarf.
Just be sure to heat set each stamped image before stamping the next image.


Once I stamped around the scarf, I sewed the edges to finish.
I probably should have done that first - but I was just too anxious to start stamping that I didn't think of sewing the edges till I was done!


Deep Wood Crafter's Ink is a very dark green and looks really pretty against the pink background.


So what do you think of the pink scarf next to my white shirt?  It's such a lovely shade of pink and the green flowers really stand out on the background.
 
Reviewing this book has definitely opened my mind to trying something new.   I have always wanted to use stamps with fabric, but could never find the time.  Well, now that I've tried it, I will definitely be using fabric and stamps again.

Please leave me a comment, I'd love to know what you think!

Use the Rafflecopter below for a chance to win a signed copy of the book plus a $100 gift card from Dharma Trading.


a Rafflecopter giveaway


Thanks for stopping by.

Steph

4/14/15

Treat containers

Pop on over to the Robin's Nest blog today.  I'm showcasing some fun pillow boxes made with the W R Memories Punch Board and papers from the Robin's Nest.


Fill these little boxes with your favorite treats.

 
Thanks for stopping by today.
 
Steph
 

4/12/15

Easter Chickie

Hi everyone.  I know that Easter was last week, but I wanted to show you what I created with some fun stamps from So Suzy Stamps.

Have you ever found a stamp that was perfect for a specific holiday?  Well, this little Chicky with Egg from So Suzy Stamps is the cutest!  I die cut an opening in the front of the card and allowed him to peak out from inside. 


The interior layer was embossed with a Sizzix embossing folder and the Chicky was colored and placed on top so it peaked out from the window.

 
He was colored with Copic Markers and adhered to layers of the same cardstock I used for the card.


And Chicky is just as cute sitting on the edges of Easter place cards.  Just color the chicks and fussy cut them, placing them to the left of the names.
 
 
Aren't they just the cutest?  They looked so cute on the Easter table.

Thanks for stopping by today.

Steph


4/11/15

Little Rose Box

Hi everyone, I never realized that working with Makin's Clay could be so much fun.  I came across this little wood box and decided to see what I could create with it.


Begin by painting the box lightly with beige  paint
Age the box by inking the edges with ColorBox  Crafter's Ink in Stone 
Using ColorBox Crafter's Ink for Ann Butler in Berry, ink the Diamonds Background Basics Stamp and stamp lightly around the box - complete coverage is not necessary

 
I wanted to create a few different colors so I used the Makin's Clay Mixing Ruler
Add red clay into "F" and white clay into "E"
Mix the colors together


While I only used a little bit of white clay, you can still see the color change - Rose #2 is the original red rose.  Roses #1 and #3 are slightly lighter because of the addition of white clay.


Create leaves and a ribbon and allow all the pieces to dry at least 24 hours before adding them to the box.
 
 
Pearl Iridescents were rubbed into the roses for a shimmery effect.


I added some fun ribbon along the top edge of the box and added some pattern paper inside to finish.
 
 
I'm thinking this would be a great gift for the princess in your life.  What do you think?
 
Thanks for stopping by today.
 
Steph
 

4/8/15

Outdoor entertaining with Walnut Hollow and Kunin products


Welcome to the Walnut Hollow and Kunin Group blog hop! April 22 is Earth Day and we are celebrating with a very special blog hop. Kunin Felt and Walnut Hollow, two “Made in the USA” companies committed to eco-friendly practices and quality products partner to bring you indoor-outdoor home decor projects.

At Kunin Group, it all began with Stephen Seymour Kunin in the 1960’s, “the Father of Craft Felts”. Now The Kunin Group, located in NH manufactures adhesive-backed, die-cut, embossed, and stiffened fabrics in several color and style options using their Eco-fi fiber. Kunin turns trash into treasure using 100% post-consumer recycled plastic bottles. Over six hundred million bottles end up in landfills each year, so far this year Kunin has recycled over 350,000, 000 and counting. This adds the value of environmental stewardship to the fun of making crafts. 

Walnut Hollow® began as a small family-owned business in Dodgeville, WI in the 70’s. Walnut Hollow is committed to protecting the environment and replenishing natural resources.    The company’s owners and employees have been since the beginning strongly committed to preserving natural resources through its raw materials consumption practices, production processes, recycling activities, and community involvement. The Ladd's (owners and founders of Walnut Hollow) have planted more than 300,000 trees and shrubs on personal property in the surrounding area. Whenever possible, raw material is harvested from plantation and managed woodlands for the manufacture of their home décor items and wood surfaces. Through their manufacturing process no wood waste ends up in landfills, all is recycled. Walnut Hollow’s emphasis has always been to bring the best possible quality products to art and craft hobbyists.

Today I am sharing how to make outdoor (and indoor) entertaining more fun and enjoyable using some amazing products from Walnut Hollow and the Kunin Group.


I used a Rustic Tray Square from Walnut Hollow.  I began by painting it with Deco Arts paint, then grunged it up a bit by inking it with ColorBox Crafter's Ink in Stone.


The tray is approximately 11" square so I pieced the Brown Leopard Printzfelt from the Kunin Group and adhered it as the bottom layer with Helmar Fabric Adhesive, which is perfect for adhering all kinds of fabric, including felt.


The second/top layer is Cashmere/Tan Prestofelt which is another felt collection, and it's self adhesive!  Prestofelt's bond is strong and it bonded well with the bottom layer of felt and it looks great on the tray. 


The tray is the perfect piece for holding glasses and silverware for your next outdoor event.  Using some left over scraps of felt I tied them around the silverware and the glasses to dress them up and have them coordinate with the base pieces.  The felt is easy to cut, does not fray, is fade resistant and doesn't mildew.


Once the tray was completed, I decided to work on the Rustic Bin.  I also painted it with Deco Arts Paint and grunged it up a bit with Clearsnap Crafter's Ink in Stone.


Using Black Friendly Felt and the Leopard print, I adhered it around the bin with Helmar Fabric Adhesive.   I also placed silverware in the bin to show another use for it.


I can't wait for Summer to arrive so the outdoor entertaining can begin.  And this will be a focal point on my table.


Find out more about Kunin Group here:
And find out more about Walnut Hollow here:
Our teams are sharing projects that pair both Kunin Group felt and Walnut Hollow wood products to create practical and beautiful home decor, organizing solutions, and entertaining items. You can make these projects all year long, not just for Earth Day. To see more inspiring projects, continue on the hop using the list below:

Walnut Hollow
Kunin Group Felt
Sue Eldred
Beth Watson
Debra Quartermain
Sabrina Alery
Abby Davis
Jennifer Priest 
Marilyn Gossett
Laura Kelly
Steph Ackerman YOU ARE HERE
Laura Bray GO HERE NEXT

And to sweeten the Made In the USA, eco-friendly fun, we're having a giveaway! We're sending an assortment of Walnut Hollow wood products to one lucky crafter. Use the widget below to enter to win!

a Rafflecopter giveaway
 
 
Thanks for stopping by today.

Steph