12/30/16

My Spiritual Closet Canvas

Hey everyone, don't you love play time.  Just time to play with your supplies and see what you can create?  I adore just playing and seeing where it takes me.

Today, I've been playing with some fun spray inks from Lindy's Stamp Gang. 


Using the Neon Graffiti kit, I spritzed 4 colors on a canvas panel, drying between each layer so the colors wouldn't get muddy.


Next, I spritzed urban amethyst and sidewalk chalk on my craft mat and mixed the colors.


Using a paint brush, I painted a chipboard dress form with the mixture. I added a few highlights with urban amethyst once the dress was dry.  I used blazing black mixed with sidewalk chalk for the dress from stand.


The stamp from Joy Clair, was die cut and urban amethyst was painted around the edges.  It was then matted with 2 layers of cardstock and adhered to the panel to the right of dress form with Beacon Adhesives.


The flowers were spritzed with urban amethyst and, once dry, added around the dress form.  Pearls from the Robin's Nest were added to the waist of the dress.


I love how this panel turned out.  What do you think?

Thanks for stopping by today.

Steph

12/29/16

You are the BEST Card

Hey everyone, I've had some time to play recently and wanted to check out my newest spray inks from Lindy's Stamp Gang.  I'm using the Neon Graffiti set which consists of 5 vibrant colors.


I began by spritzing all the colors on white cardstock.  Using the overspray on the craft mat, I placed another panel of white on top and created a blotchy look.  Then I dragged a final panel of white through the left over ink on the craft mat for a feathery look.  So I started with 3 different looks.


I used the white panel I dragged through the left over ink as my card base.  After inking the edges, I add a strip of corrugated cardstock on top and wrapped it with some twine from Whisker Graphics


I then matted the panel with cardstock.


Using the first white panel I spritzed, I cut it size then embossed it with a Cuttlebug embossing folder.  After matting it with cardstock, I added it to the card with foam adhesives for dimension.


Flowers were added to the card with brads and a sentiment from Joy Clair was stamped, cut into a pennant shape and then added amongst the flowers.

I absolutely love how it turned out.  What do you think?

Thanks for stopping by today.

Steph

12/28/16

Stars with Just For Fun Rubber Stamps

Hi everyone, I've got a new post on the Just For Fun Rubber Stamp blog and I've used the Stamptangle Star small.


I repeatedly stamped the Star on white cardstock, then added color using Smooch Accent Ink.


Stop by the blog for more details.
 
Thanks for stopping by today.
 
Steph


12/27/16

Bowdabara Snow Wreath

Hi everyone.  I'm on the Bowdabra blog with this fun snow wreath.

Not only does it look pretty, but it was so easy to make.


Made of white tulle, I added color by spraying it with Design Master Tint It in Jade.

Please check the Bowdabra blog for details.

Thanks for stopping by today.

Steph


12/26/16

Roundup with Joy Clair stamps

Hi everyone, it's my day to post on the Joy Clair blog and for the final post of 2016 it's time to do a round up of my favorite projects.


Fall Time Planner and Hello Autumn


Bee Kind


Uh Oh Ink Splatters

 
My Cup Runneth Over
 

There are more cards I could have chosen, but these are my favorite.
 
Please stop by the JoyClair blog for more details and see everyone's amazing projects.
 
Thanks for stopping by today.
 
Steph


12/24/16

Quick and Easy Gift Ideas - Day 10

Hi everyone.  Christmas will be here before we know it.  The last two years I've blogged about last minute Christmas ideas you could make in under 30 minutes.  Well, it's that time again and I've got some new projects to share.

Today it's Christmas Eve and it's all about tags.  Tags not only can adorn your boxes and packages, but consider using them as gift card holders.


Use an assortment of different sized tags and cover them with pattern papers.  This is a perfect project for using up all your scraps.


Add a strip of corrugated paper across the center and create a "pocket" using a Christmas stamp from Clearsnap. 


Slip a gift card between the layers and give to someone special. 


I hope you've enjoyed my 10 days of quick and easy gift ideas.

If you missed my previous posts, you can find them here: 
Day 1
Day 2
Day 3
Day 4
Day 5
Day 6
Day 7
Day 8
Day 9

Merry Christmas everyone.


Steph

12/23/16

Paverpol Napkin Rings

Hi everyone, I've got a new post on the Paverpol blog today.

Using Transparent Paverpol, I created some festive Christmas napkin rings.  They were so much fun to create and look absolutely stunning.


I used a paper towel tube and covered it with Transparent Paverpol.  Once the Paverpol hardened, I removed the tube and cut it into 4 pieces with the help on the Proxxon Jig Saw.  I spritzed them with Tattered Angels Glimmer Mist then added ribbon and pearls to finish them.


Please stop by the Paverpol blog for all the details.


Thanks for stopping by today.

Steph


Quick and Easy GIft Ideas - Day 9

Hi everyone.  Christmas will be here before we know it.  The last two years I've blogged about last minute Christmas ideas you could make in under 30 minutes.  Well, it's that time again and I've got some new projects to share.

And today I am on the Clearsnap blog with this fun Snowman Bag.


Supplies:
Colorbox Crafter's Ink by Ann Butler - Blueberry, Canyon
ColorBox Crafter's Ink by Ann Butler Reinkers - Tangelo, Sunshine, Aquamarine
Unity Stamps - 1" Faux Quilting Stamps

 
I found this cute canvas tote in a local store and decided to color it with Ann Butler's Crafters Ink.
Place a piece of cardboard inside so the ink does not leak through the canvas


Begin by placing several drops of Tangelo on an acrylic block.
Use a paintbrush to paint in his nose.

 
Continue painting the canvas bag with Limelight and Aquamarine.  The reinkers are perfect to use with a dry paintbrush. 
I painted his hat with Canyon Ink as I did not have a reinker.  I added a little bit of water on my brush to smooth the ink

 
Next, I used Unity Stamps with Blueberry ink to create a pattern around the edges of the bag,


Isn't this adorable?  Wouldn't it make a wonderful gift to give some special?  Just fill with little goodies and gift it.


If you missed my previous posts, you can find them here: 
Day 1
Day 2
Day 3
Day 4
Day 5
Day 6
Day 7
Day 8

Thanks for stopping by today.

Steph

12/22/16

Quick and Easy Gift Ideas - Day 8

Hi everyone.  Christmas will be here before we know it.  The last two years I've blogged about last minute Christmas ideas you could make in under 30 minutes.  Well, it's that time again and I've got some new projects to share.

Today's project is a frame you can have the kids create for friends and family.


Using a wood frame, paint it any color you want.  I chose some blue glitter paint that would coordinate with the stickers.  Allow it to dry completely.


Add a selection of foam stickers including snowmen, sleds, snowflakes and snowballs.  The kids will have a ball creating this frame.


Thanks for stopping by today and don't forget to stop by daily as I show you more quick and easy Christmas projects you can make in less than 30 minutes.


If you missed my previous posts, you can find them here: 
Day 1
Day 2
Day 3
Day 4
Day 5
Day 6
Day 7


Steph

12/21/16

Last Minute Christmas Cards with Joy Clair

Hi everyone.  The crunch is on.  It's only 4 days till Christmas.  Have you gotten your card done yet?
 
Here are 2 last minute cards using the newest stamp set from JoyClair.  These include the Christmas Borders stamp set and Holly Jolly Santa stamp set.
 
 
I left the border stamps on their backing and inked each line a different color.  Then I simply placed white cardstock on top and rubbed to get the designs. 

 
Quick and easy!!!  Then just ink the edges and mat with cardstock before adding to the card.  Die cut the holly jolly stamp and add to the card.


This card is quite simple - I stamped the sacks three times directly on the card, then colored them with Copic Markers.  Then I used one of the border stamps for the top of the card.
 
Thanks for stopping by today.
 
Steph
 

Quick and Easy Gift Ideas - Day 7

Hi everyone.  Christmas will be here before we know it.  The last two years I've blogged about last minute Christmas ideas you could make in under 30 minutes.  Well, it's that time again and I've got some new projects to share.

If you need to create something quick for the holidays, stop by the next 10 days and  I will show you some fun, quick and easy projects.

Today's project is paint bucket treat holders.


I love these little buckets. 


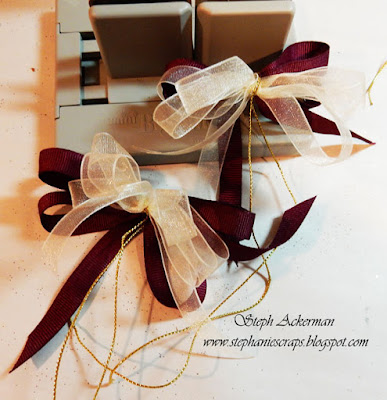
To add a decorative feature, I used the Bowdabra to create bows that I tied to the handles.


I used 2 different ribbons and the Bowdabra was instrumental in creating the bows quickly and easily.


Fill them with candies, add the bow and you are done.

Thanks for stopping by today and don't forget to stop by daily as I show you more quick and easy Christmas projects you can make in less than 30 minutes.

If you missed my previous posts, you can find them here: 
Day 1
Day 2
Day 3
Day 4
Day 5
Day 6

Steph

12/20/16

Quick and Easy Gift Ideas - Day 6

Hi everyone.  Christmas will be here before we know it.  The last two years I've blogged about last minute Christmas ideas you could make in under 30 minutes.  Well, it's that time again and I've got some new projects to share.

If you need to create something quick for the holidays, stop by the next 10 days and  I will show you some fun, quick and easy projects.

Today's project is metal ornaments.


It's easy to customize metal ornaments. Add letter stickers on the ornaments.


Paint with Folk Art Milk Paint in Petticoat.  Allow to dry completely before continuing.


Once dry, remove the letter stickers to reveal the underlying metal.  I used Lindy's Stamp Gang sprays to add colors to each ornament.


Finally, I added Crafter's Ink to add dimension to each ornament.


Thanks for stopping by today and don't forget to stop by daily as I show you more quick and easy Christmas projects you can make in less than 30 minutes.

If you missed my previous posts, you can find them here: 
Day 1
Day 2
Day 3
Day 4
Day 5


Steph

12/19/16

Quick and Easy Gift Ideas - Day 5

Hi everyone.  Christmas will be here before we know it.  The last two years I've blogged about last minute Christmas ideas you could make in under 30 minutes.  Well, it's that time again and I've got some new projects to share.

Today, it's all about thanking those who do something nice for you.


I picked up some preprinted canvas bags and added spray inks for color.

 
Just fill them with candies, a candy cane and perhaps even a gift card.  This would be perfect for teachers, mail carriers, friends, or anyone I wish to thank.
 
Thank you for stopping by.
 
If you missed my previous posts, you can find them here: 
Day 1
Day 2
Day 3
Day 4


Steph

12/18/16

Quick and Easy Gift Ideas - Day 4

 
Are you ready for the holidays?
Do you need some last minute gift ideas?
We invite you to join the Last Minute Gift Ideas blog hop with a great group of talented designers. Hop from blog to blog and find easy, fast and amazing last minute gift ideas!
You can also win a great prize! Visit all the blogs participating in the hop, leave a comment and you can win a $100 Visa gift card!

Today's project is glass ornaments.


Glass ornaments are difficult to color with inks so I used etchall® dip 'n etch to etch my ornaments before coloring them. 


I placed the ornaments in a bowl of dip 'n etch for approximately 15 minutes.   Once I removed them, I rinsed and dried them thoroughly.  Dip 'n etch is reusable so be sure to put it back into the container once you are done etching your projects.


Begin by spritzing the ornaments with a variety of colors of spray Inks.  I used Lindy's Stamp Gang sprays, but any spray inks will work.


Be sure to heat set between each color to avoid the colors getting muddy.


Spritz white ink last and watch how it interacts with the other colors.


Every ornament needs a bow so I used the Bowdabra to create a bow for each ornament.


The Bowdabra can create any sized bow with any type of ribbon.


Use Fabri-Tac to adhere pearl lace to the ornaments.


Add a Joy Clair stamped sentiment and die cut it with Spellbinders dies for the center of the ornaments.  Use the excess gold wire from the bow as the ornament hanger.
 
Thanks for stopping by today and don't forget to stop by daily as I show you more quick and easy Christmas projects you can make in less than 30 minutes.

You have plenty of chances to enter to win $100 Visa gift card on any of the participating blogs.  Everyone is eligible to win, whether you’re in the U.S. or international.  Here's the hop list:
 
 
In order to win leave a comment answering this question – “What is your favorite “can’t live without” craft supply or tool?”
Then enter using rafflecopter:
 http://www.rafflecopter.com/rafl/share-code/YzRlMWZiYjMyNGQ0NTViMTYwNWEyZGJjNjhmMTdlOjE=/?

The winner of the $100 Visa gift card will be announced on einatkessler.com on Sunday, Dec 25th. 


If you missed my previous posts, you can find them here: 
Day 1
Day 2
Day3


Steph